Generate Print Ready File using API
API Credentials
Before starting to use our API we should first create an API token:
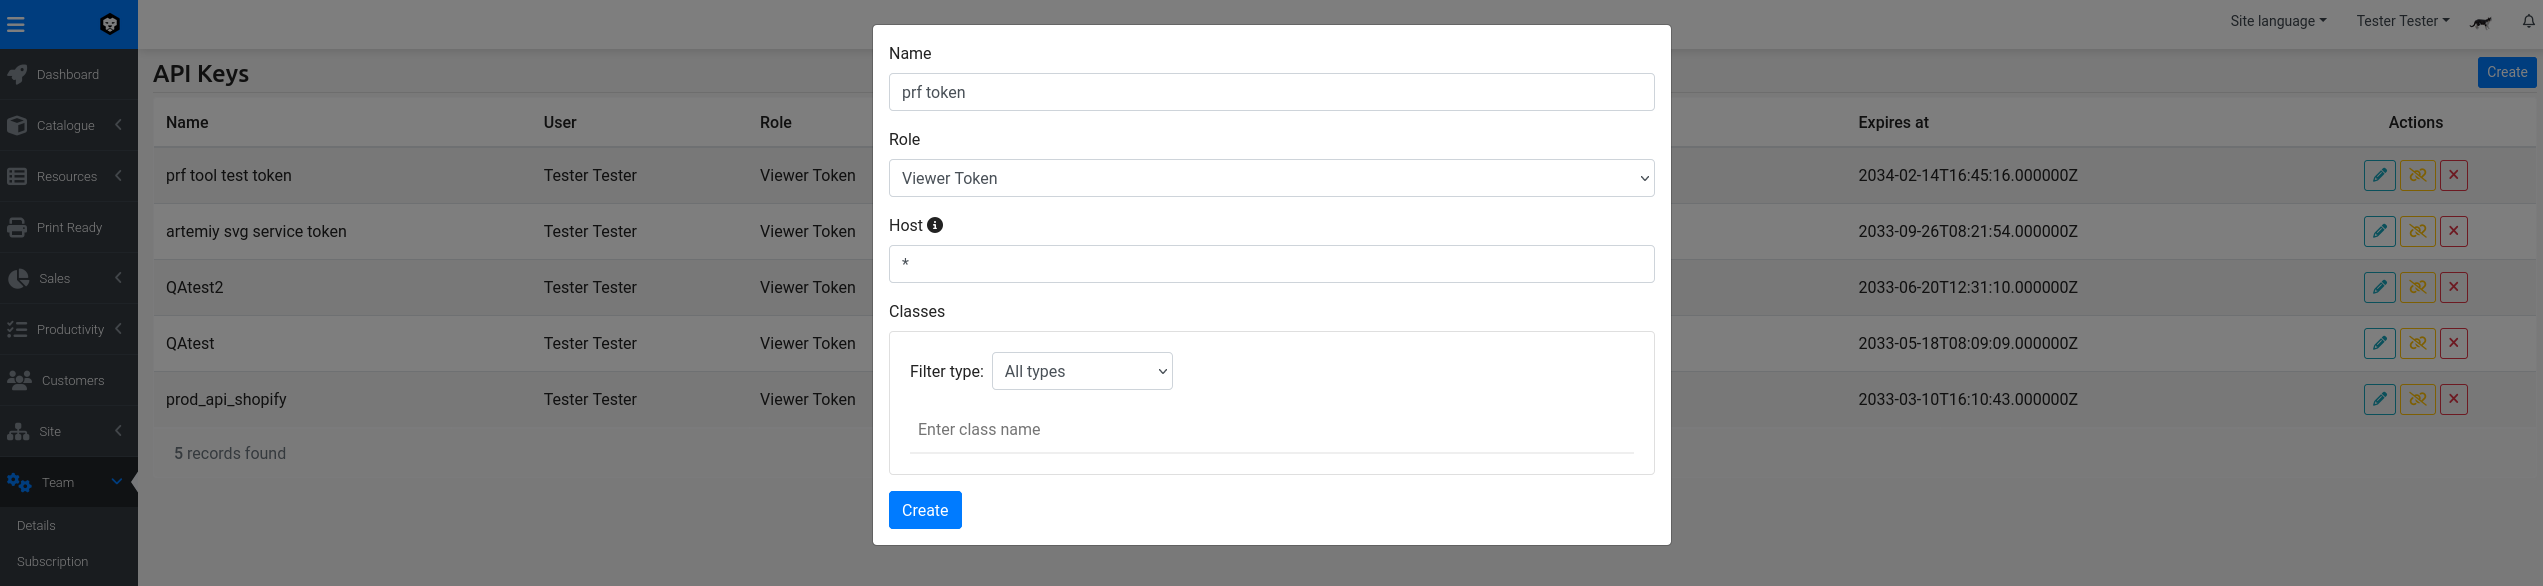
- Go to Api Keys on the Expivi dashboard and press on the
Createbutton. - Set a descriptive name and select the
Viewer Tokenrole. Press on theCreatebutton.
Make sure to use an API key of type "Viewer Token" here, as it provides only read access. It is also recommended to enter your website's domain in the "Host" field to narrow the usability of the token.
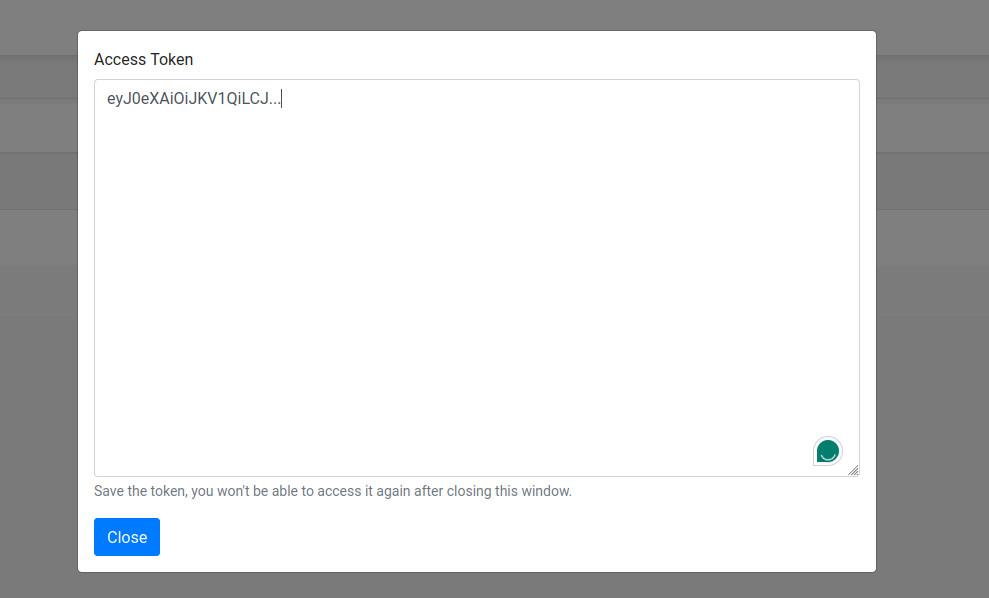
- A new token will be shown after its creation.
warning
Make sure to save this token for later use, since you won't be able to access it again after closing this modal.
- You can close the window and start using the token.
Authentication and Authorization
Api Authorization Header
Our API is stateless, so you need to provide a token for each request.
We use Bearer authentication so a valid token should be provided via the Authorization header.
Refer to API Credentials in order to create a token.
Create Configured Product
This endpoint creates a new ConfiguredProduct based on the received configuration.
That configuration is generated from the configuration viewer (Refer to Get product configuration).
Request
POST: /api/configured_product/bundle
Headers
| Header | Value |
|---|---|
Authorization | Bearer {Token} |
Content-Type | application/json |
Accept | application/json |
Host | expivi.net |
Body
Here is a sample JSON configuration that shows the structure of the configuration. (Refer to Get product configuration to generate a valid configuration).
{
    "bundle_uuid": "xxxxxxxx-xxxx-xxxx-xxxx-xxxxxxxxxxx",
    "configured_products": [
        {
            "version": "2.0",
            "catalogue_id": 2649,
            "configuration": {
                "attributes": [
                    {
                        "attribute_id": 143408,
                        "attribute_name": "svg_canvas",
                        "attribute_value": {
                            "media_id": 149549,
                            "print_ready_file_id": 24,
                            "svg_element": "image52",
                            "canvas": {
                                "objects": [],
                                "type": "",
                                "version": 0
                            }
                        },
                        "attribute_value_name": ""
                    }
                ],
                "materials": {
                }
            },
            "attributes": [
                {
                    "attribute_id": 143408,
                    "attribute_name": "svg_canvas",
                    "attribute_value": {
                        "media_id": 149549,
                        "print_ready_file_id": 24,
                        "svg_element": "image52",
                        "canvas": {
                            "objects": [],
                            "type": "",
                            "version": 0
                        }
                    },
                    "attribute_value_name": ""
                }
            ],
            "thumbnail": "data:image/jpeg;base64,/9j/4AAQSkZJRgABAQAAAQABAAD/...",
            "articles": [],
            "type": "root",
            "scene_object_id": null,
            "uuid": "xxxxxxxx-xxxx-xxxx-xxxx-xxxxxxxxxxx",
            "bundle_uuid": "xxxxxxxx-xxxx-xxxx-xxxx-xxxxxxxxxxx",
            "view_position": [
                0,
                0,
                0
            ],
            "view_rotation": [
                0,
                0,
                0
            ],
            "view_quaternion": [
                0,
                0,
                0,
                1
            ],
            "view_scale": [
                1,
                1,
                1
            ],
            "price": {
                "base": 354
            },
            "replication_type": "ORIGINAL"
        }
    ]
}
Response
The response contains the configured product's uuid and id:
{
    "1dab9ebe-30b7-4bd0-7835-1f7dcac436fe": 146428
}
The id is used in the next step SVG Conversion
SVG Conversion
Once the configured product is created, the user can proceed to create a single print-ready file using this endpoint. Note that it accepts different formats depending on the user's needs. That will be the resulting format for the print-ready file.
Request
POST https://expivi.net/api/svg/conversion/request/{format}
Parameters
format- the resulting format of the converted image that will be also used for Print Ready File. Possible values are:jpgjpegpdfpngwebpsvgtiff(The Vector Conversion feature is required)eps(The Vector Conversion feature is required)
Headers
| Header | Value |
|---|---|
Authorization | Bearer {Token} |
Content-Type | application/json |
Accept | application/json, text/plain, */* |
Host | expivi.net |
Body
configured_product_id(required) - Configured product ID retrieved in the Create configured product step.print_ready_file_id(required) - The identifier of the Print Ready File Configuration of which you want to generate a Print Ready File. (See Create configured product)
{
    "configured_product_id": 123,
    "print_ready_file_id": 12
}
The conversion will use the Print Ready File settings that are defined in the Backoffice, but we have the ability to override these properties within the request. Just provide any of the following settings to override the original ones:
hide_placeholders- Hides the placeholders.hide_print_marks- Hides the print marks.cmyk- Whether to convert a PDF to CMYK.color_profile- The file to use as color profile for CMYK conversion.dpi- The DPI for the raster output.resolution- The resolution for the output; min 32, max 6144.attribute_payload- Array of objects containing the Expivi attributes.masks- An array of object masks.pattern- An SVG Pattern.selector- A selector for the element in the SVG to scale with wildcard support.
transformations- An array of object transformations.scale- A float determining the new scale.selector- A selector for the element in the SVG to scale with wildcard support.origin- An object with the scale origin.x- The X coordinate for the scale origin.y- The Y coordinate for the scale origin.
fonts- An array of object fonts.name- The name of the font.url- A URL to the font.
Response
The response contains the conversion hash, and also the status and files properties.
hash- SVG conversion hash.status- Reflects the status of the conversion. The possible values are:in-progress: The conversion is still in progress. We can check the conversion status by this hash in the next step. Check SVG Conversion.complete: The conversion is successfully completed. We can Preview and Download Print Ready File now.
files- Contains the URLs of the generated Print Ready Files if thestatusof the conversion iscomplete. Will be empty ifstatusisin-progress.
{
    "hash": "8c09205c75d154591c9f5bc3798dda7a",
    "status": "in-progress",
    "files": []
}
Check SVG Conversion Status
Generating a Print Ready file would generally be finished within seconds. The time it takes to finish a Print Ready file depends on the configuration. The bigger the configuration, the longer it takes to apply all the changes in the Print Ready file. The size of the configuration is generally in line with the amount of SVG attributes you provide in your product.
In extreme cases, a configuration could take more than 30 seconds. Such time is no good to stall your website until the conversion is finished. This API will help keep track of the progress of the conversion.
This request requires an API key of type "Team Owner Token".
(You can skip this if the conversion was already completed in the previous step SVG Conversion).
Request
GET https://expivi.net/api/svg/conversion/check/{hash}
Parameters
hash- Conversion hash obtained in the previous step SVG Conversion
Headers
| Header | Value |
|---|---|
Authorization | Bearer {Token} |
Content-Type | application/json |
Accept | application/json, text/plain, */* |
Host | expivi.net |
Response
hash- SVG conversion hashstatus- The current status of the given conversion. The possible values are:in-progress: The conversion is still in progress.complete: The conversion is successfully completed. We can Preview and Download Print Ready File now.failed: Something went wrong and the conversion wasn't complete.
files- Contains the resulting Print Ready File. It will have the format provided in the SVG Conversion step.
{
    "hash": "8c09205c75d154591c9f5bc3798dda7a",
    "status": "complete",
    "files": [
        "https://data.expivi.net/svg/expivi_svg_service_168847737238_iykjd.jpg"
    ]
}
Rate Limiting and Throttling
Our API requests for viewer tokens are limited to 200 requests/min. This limit is applied by IP. Once the limit is reached, you will receive a HTTP error with status code 429:
{
    "error": true,
    "code": 429,
    "message": "Too Many Attempts.",
    "class_name": "ThrottleRequestsException"
}
Error handling
Common API Errors
When an API request results in an error, we receive a response with error details and the corresponding HTTP status code. Usually, the response body contains the following data:
error- Is alwaystruein case of any error.code- Value that represents the error code.message- Brief description of the error.class_name- Exception class, used as an additional identifier.
Example:
{
    "error": true,
    "code": 429,
    "message": "Too Many Attempts.",
    "class_name": "ThrottleRequestsException"
}
Validation Errors
In case of a validation error, the API will throw a 422 Unprocessable Content HTTP response.
The response body has a slightly different format:
error- Is alwaystruein case of error.message- Description of the validation error.class_name- Is alwaysValidationException.messages- An array that contains the fields that didn't pass the validation with their respective error messages.
Example of a validation error for invalid identifier field:
{
    "error": true,
    "message": "The identifier must be a string.",
    "class_name": "ValidationException",
    "messages": {
        "identifier": [
            "The identifier must be a string."
        ]
    }
}
Api Errors
| HTTP Code | HTTP Error | Description |
|---|---|---|
401 | Unauthorized | The API key is not valid. Please double-check your API key or create a new one (API Credentials) |
403 | Forbidden | Your token doesn't have the proper role. Please make sure to assign the Viewer Token role when creating a new token. |
404 | Not Found | The resource wasn't found. Please check if it wasn't deleted |
422 | Unprocessable Content | Some fields didn't pass the validation. Please check the messages property for more information. |
429 | Too Many Requests | You've reached the API rate limit. |
500 | Internal Server Error | Something went wrong on the API side. Please check the message property for more information. |