Getting Started
Before starting with configuration, make sure that your team has the Print Ready Service enabled on your Feature Panel.
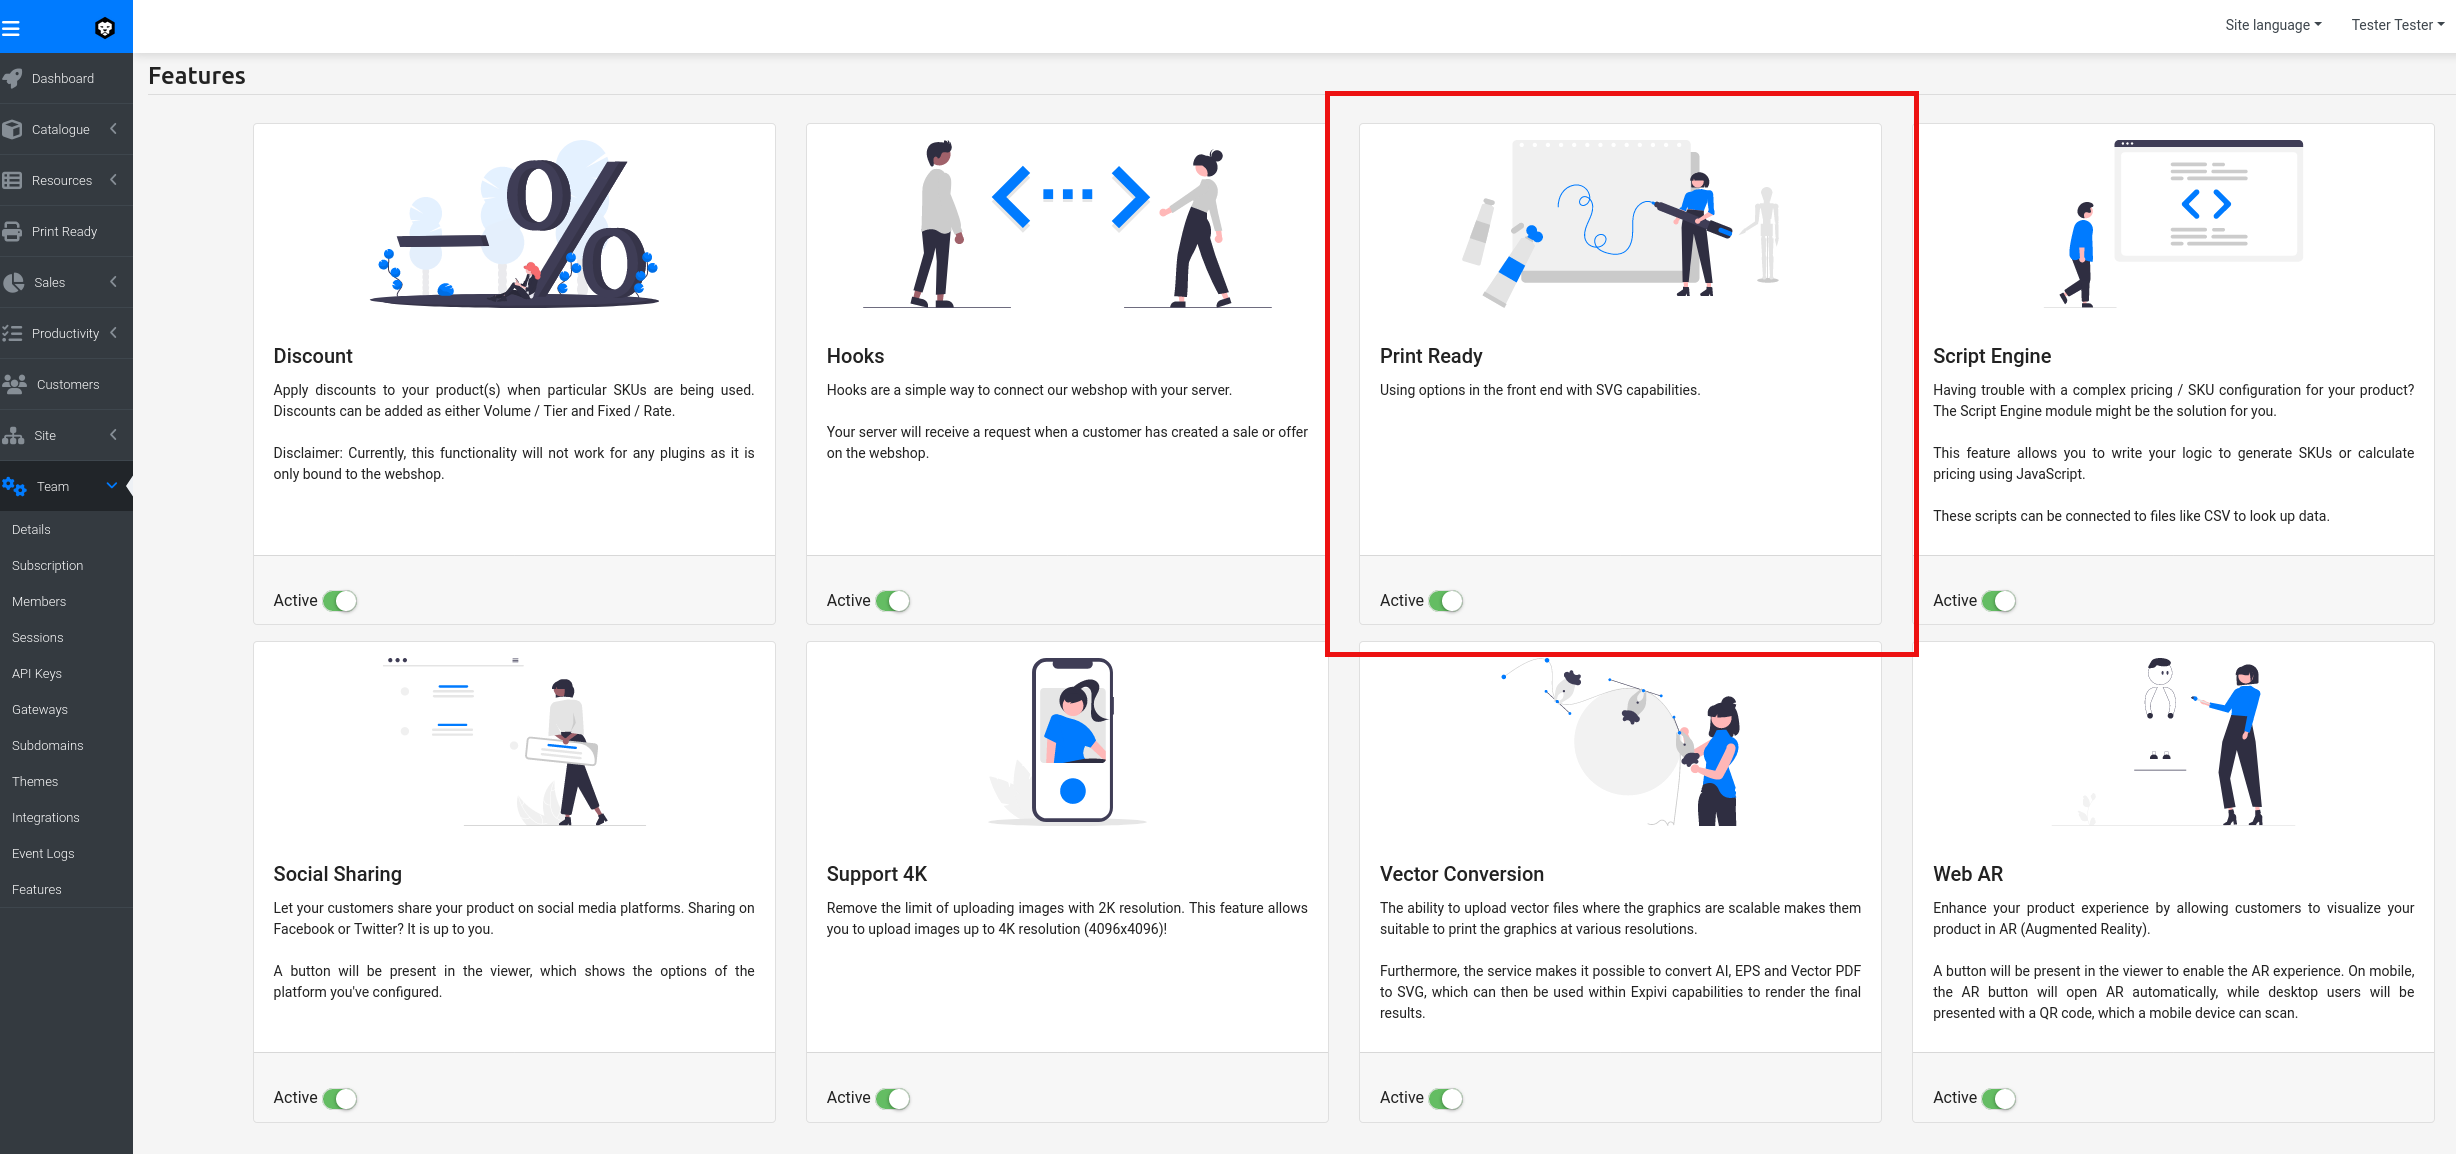
Enable the toggle for Print Ready module if it's not enabled yet.
If the Print Ready section is grayed out, then the module is not available in your subscription plan.
Please contact our Sales team for more information
Print Ready File Configuration
Once the Print Ready feature is enabled, we can create Print Ready File configurations. A Print Ready File configuration is simply a media file with additional settings on how the Print Ready file should be generated by the Print Ready Service. You can create a configuration by either using an existing media file or uploading a new one. Note: Only media files of type SVG are acceptable.
Create configuration for your Print Ready file:
- Navigate to the Print Ready configuration section.
- Create a new configuration by clicking on the 'Add' button in the top right corner.
- Select or upload a new Media.
The configuration will be named after the Media file, but you can change it to be more descriptive. Your new Print Ready File will appear in the Print Ready section, ready to be used.
Link Print Ready File to an SVG Attribute
Once a Print Ready File is configured, it must be attached to a SVG attribute, so the user can upload images or write texts on the different components:
- Select the product.
- Click on Attributes.
- Click to edit the applicable attribute to be modified.
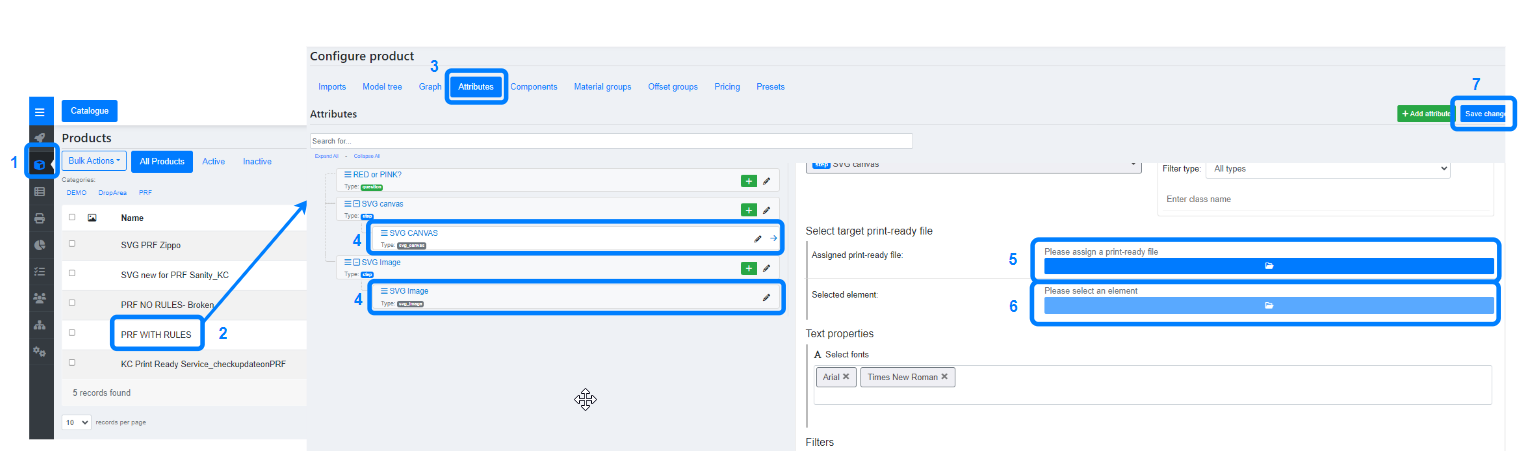
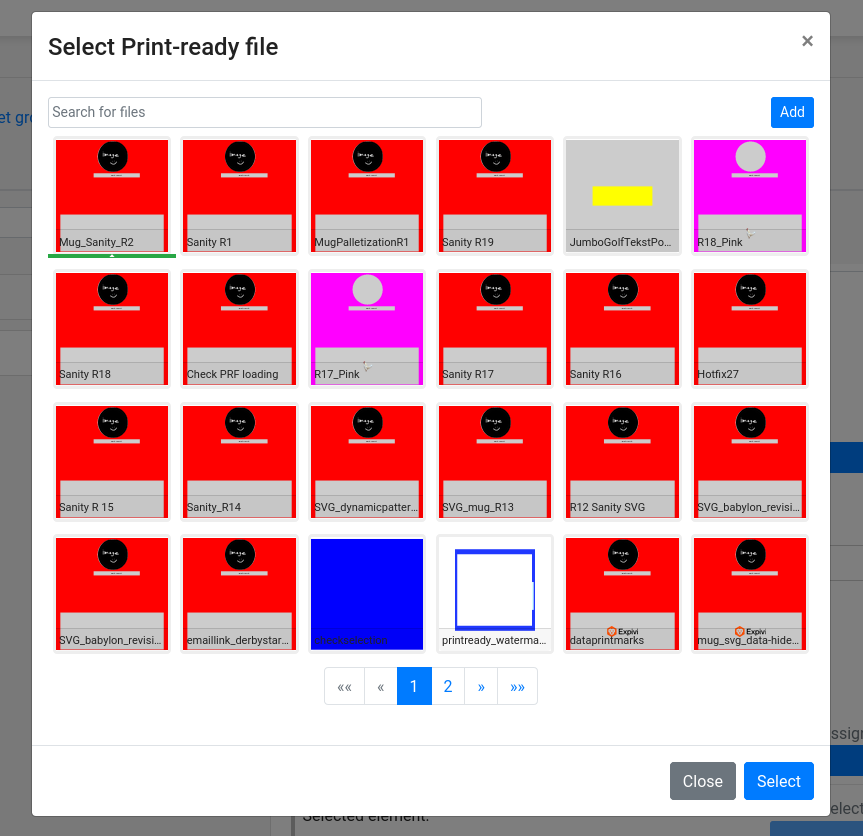
- Click to select a Print Ready File.
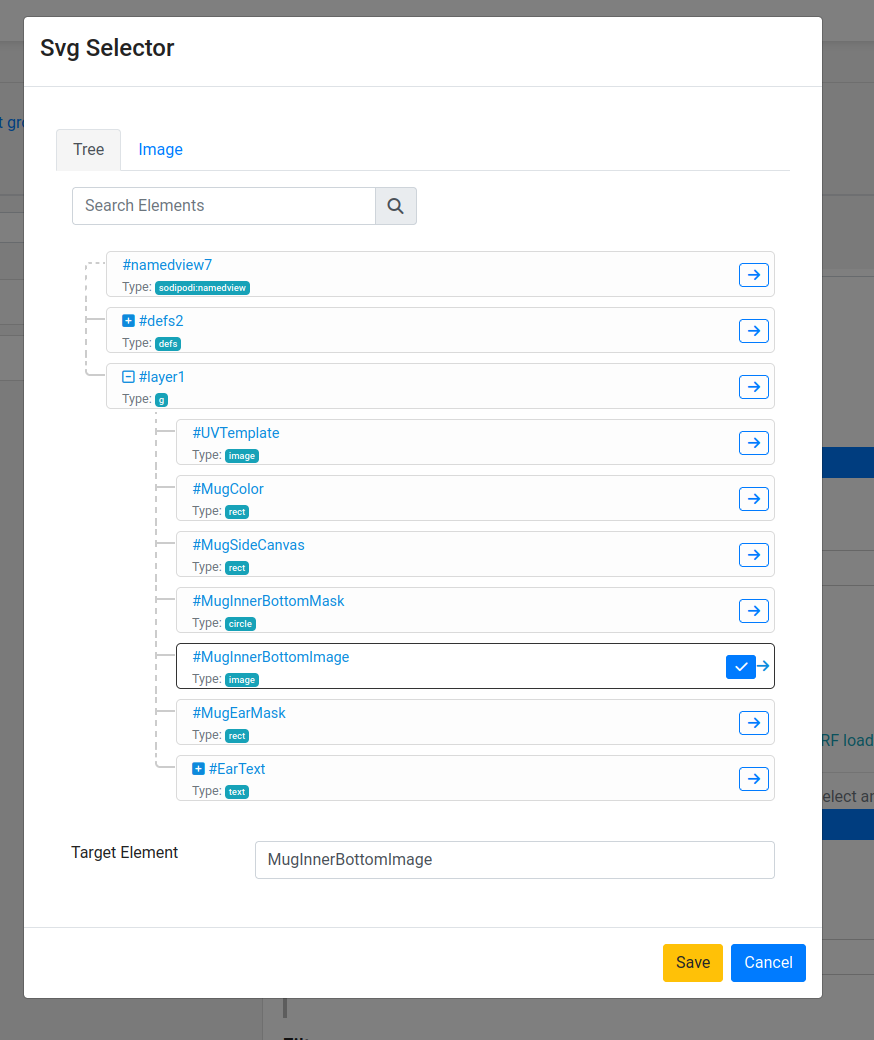
- Click to select a valid target element from the Print Ready File selected (using whether Tree or Image preview).
- Save the changes.
Once everything below is done, you can proceed to the next section and start using this feature.