Product Configuration
Product Page
The Expivi plugin will attach data and logic to existing WooCommerce products to keep the same e-commerce experience. The following sections will help connect the Expivi products to your webshop. All product settings discussed below are in the Product Data section under the Expivi Product tab.
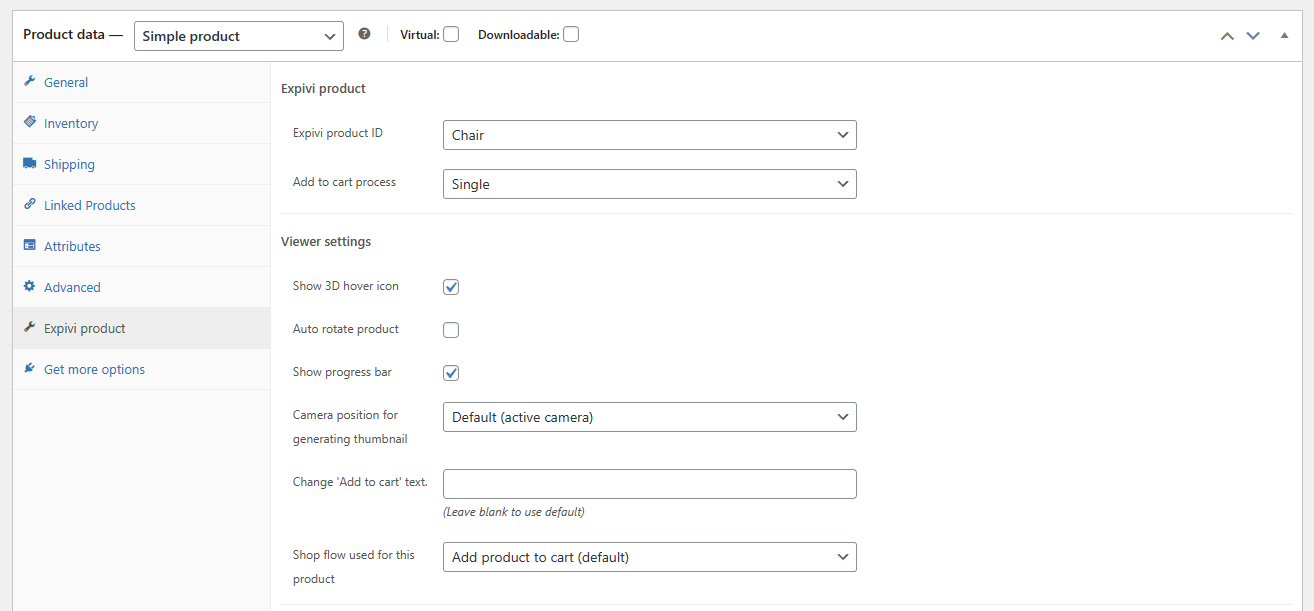
Only products of the "Simple product" type can be connected to an Expivi product.
Expivi Product and Add-To-Cart Process
A WooCommerce product is needed to show the 3D product in your webshop. The first dropdown allows you to select an Expivi product defined in the Backoffice.
If no products can be selected from the dropdown, ensure you have products in the Backoffice and that the plugin have been properly configured. Check out the Getting Started page for more details.
The add-to-cart process helps you define what type of product you want to sell.
Single
This type is used for simple standalone products. The Expivi product will attach data/logic to the WooCommerce product (original data will not be affected). This WooCommerce product can be added to the cart, but the Expivi plugin will override/append data like the thumbnail and price and add configuration to the product details.
Stock management is automatically done by WooCommerce.

Multiple
This type is used for Expivi products that act as a placeholder, as the product will not be added to the cart. The SKUs of the configured Expivi product will be used to find the related WooCommerce product. These products will be added to the cart with their original price. The quantity of the related product is determined by the number of SKUs in the configured Expivi product.
For example, the configured Expivi product will contain the SKUs:
SKU_product_1SKU_product_2SKU_product_2
The WooCommerce with the related SKUs will be added to the cart. The SKU_product_2 appears twice in the list, which means that the quantity of that product will be set to 2.
Stock management is automatically done by WooCommerce, but the Expivi plugin will first check if all related products are correctly linked and are available in stock. If one of the products is not correctly linked or out of stock, the add-to-cart process will be interrupted, and an error message will be displayed to the customer.
Generated Grouped Product
This type generates a new WooCommerce product that will behave as a grouped product. The grouped product is duplicated from the original WooCommerce product but will override the price and weight. The SKUs of the configured Expivi product will be used to find the related WooCommerce product. The quantity of the related product is determined by the number of SKUs in the configured Expivi product. The related products will not be added to the cart; however, the stock and weight will be considered during checkout. If one of the products is not correctly linked or out of stock, the add-to-cart process will be interrupted, and an error message will be displayed to the customer.
The price calculation and stock management is done by Expivi.
The generated grouped product will have an SKU based on the original WooCommerce product, calculated price, configuration, and weight. This means that the grouped product can be re-used when the customer has generated a configuration that has been ordered before.
Generate Grouped Products and use Custom Price
This type is the same as the generated grouped product, except that the price calculation differs. The price is the total amount of all related WooCommerce products bound using the SKUs in the configured Expivi product. The quantity of the related product is determined by the number of SKUs in the configured Expivi product. If one of the products is not correctly linked or out of stock, the add-to-cart process will be interrupted, and an error message will be displayed to the customer.
The visibility of the generated grouped products is made invisible by default in both the shop and catalog (admin). However, this setting can be changed on the Expivi settings page. For more information, check this page.
Viewer Settings
Show 3D Hover Icon, Auto-Rotate, and Progress Bar
These checkboxes will help you improve the product's 3D visualization (viewer).
The Auto-rotate product option will auto-rotate the product until the customer interacts with it.
The 3d hover icon and progress bar are visualization icons that can be shown/hidden by your preference.
Camera position for generating thumbnail
This setting will let you define how the thumbnail is generated before the product is added to the cart. The thumbnail will be shown in the cart, checkout, and order, so it is essential that your product looks good.
Active camera (default)- This option will generate a thumbnail using the active camera. The camera will be reset to its original position before taking the screenshot.Main camera- This option will generate a thumbnail using the camera that was selected during the start-up of the product (first camera). The camera will be reset to its original position before taking the screenshot.
Change the 'Add to cart' Text
This setting will allow you to change the text of the add-to-cart button. Leaving the field empty will use the default WooCommerce add-to-cart button values.
Shop Flow used for this Product
Add product to cart(default) - Use the default add-to-cart flow.Save design- Remove the add-to-cart button and only show a Save Design button.Save design & add to cart- Show both the Save design and add-to-cart buttons.
For more info regarding Save Design, click here.
Options Panel Settings
Show Options
This option lets you show/hide the options panel, allowing the customer to configure your product.
Hide Price and Position
This option lets you show/hide the price of the product. The second checkbox will let you define whether the price should only be shown when the amount exceeds zero.
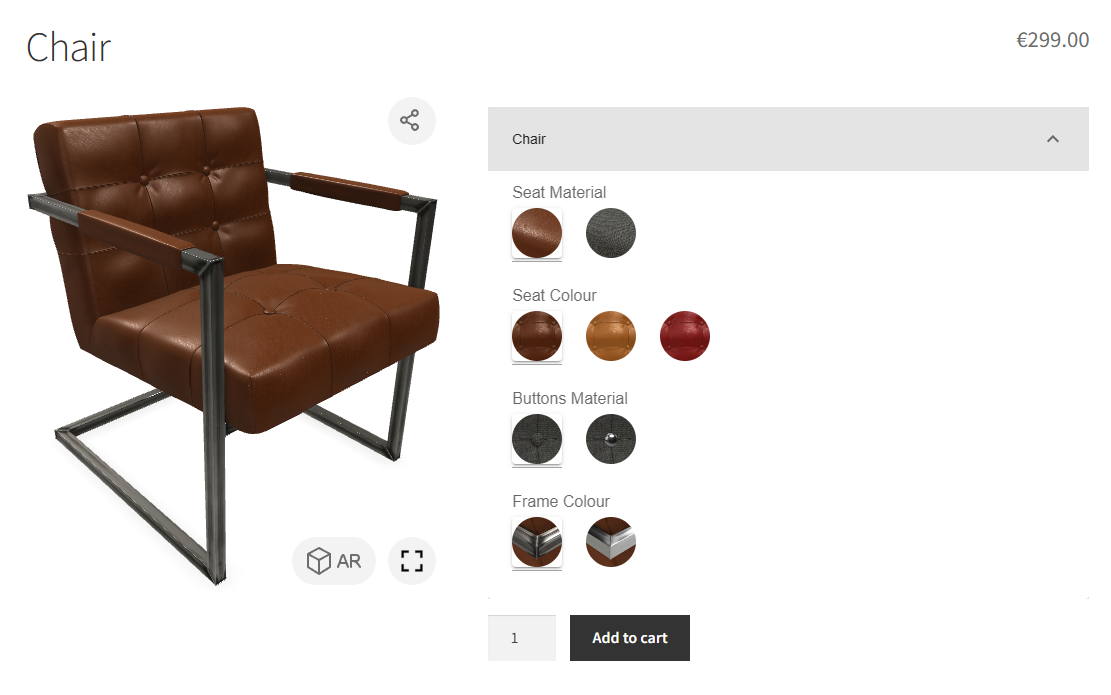
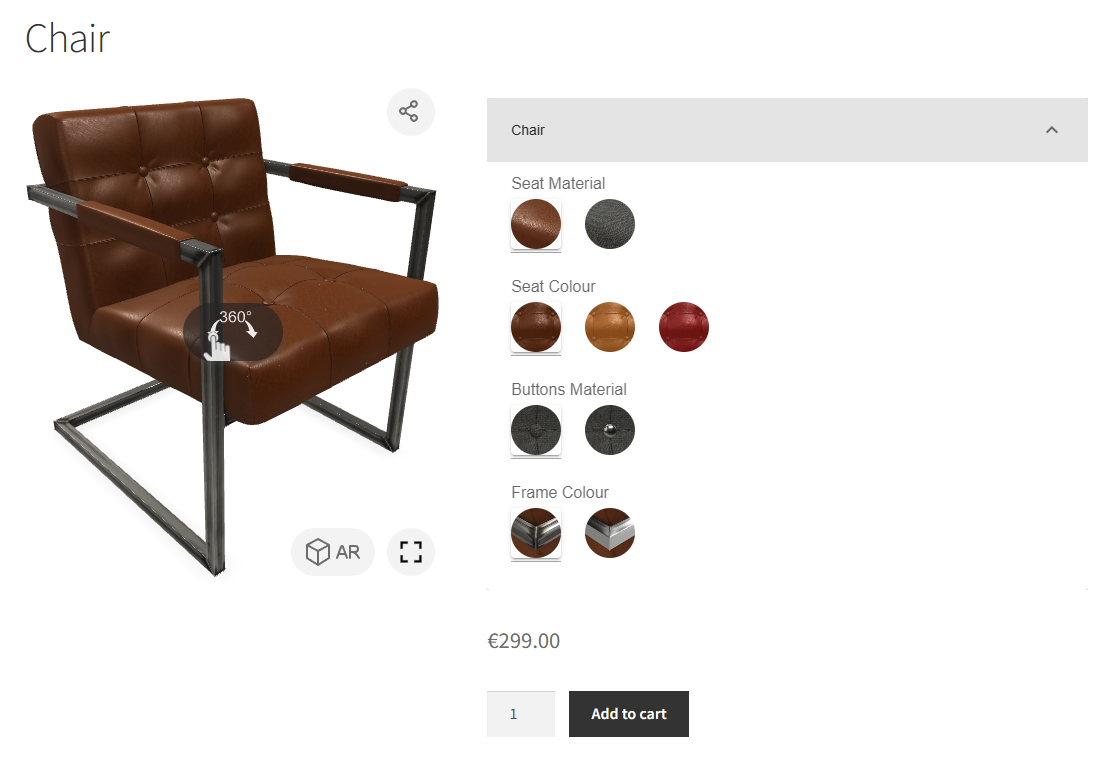
The position of the price can also be determined by whether to place the price on top/bottom (above the add-to-cart button) of the options panel.
| Price Position - Top | Price Position - Bottom |
|---|---|
 |  |
Auto Scroll to Step
This option will let the customer automatically scroll to the next step upon pressing steps or tabs in the options panel. This will help the customer navigate better through the options. Please note that this option is experimental and might not work in all browsers.
Generate PDF
Enabling this option will show a new button on the product page, letting the customer download a PDF based on the current product configuration. The template of the PDF can be altered. Please check on how to override a template here or for more info.
Please note that we do not recommend using this feature as offer generation. No data will be saved, and the document will have no ID or company/user information.
SKU Generation
This settings field will allow you to define an additional custom SKU for your configured product. The SKU can be static or dynamically built based on which attributes are selected.
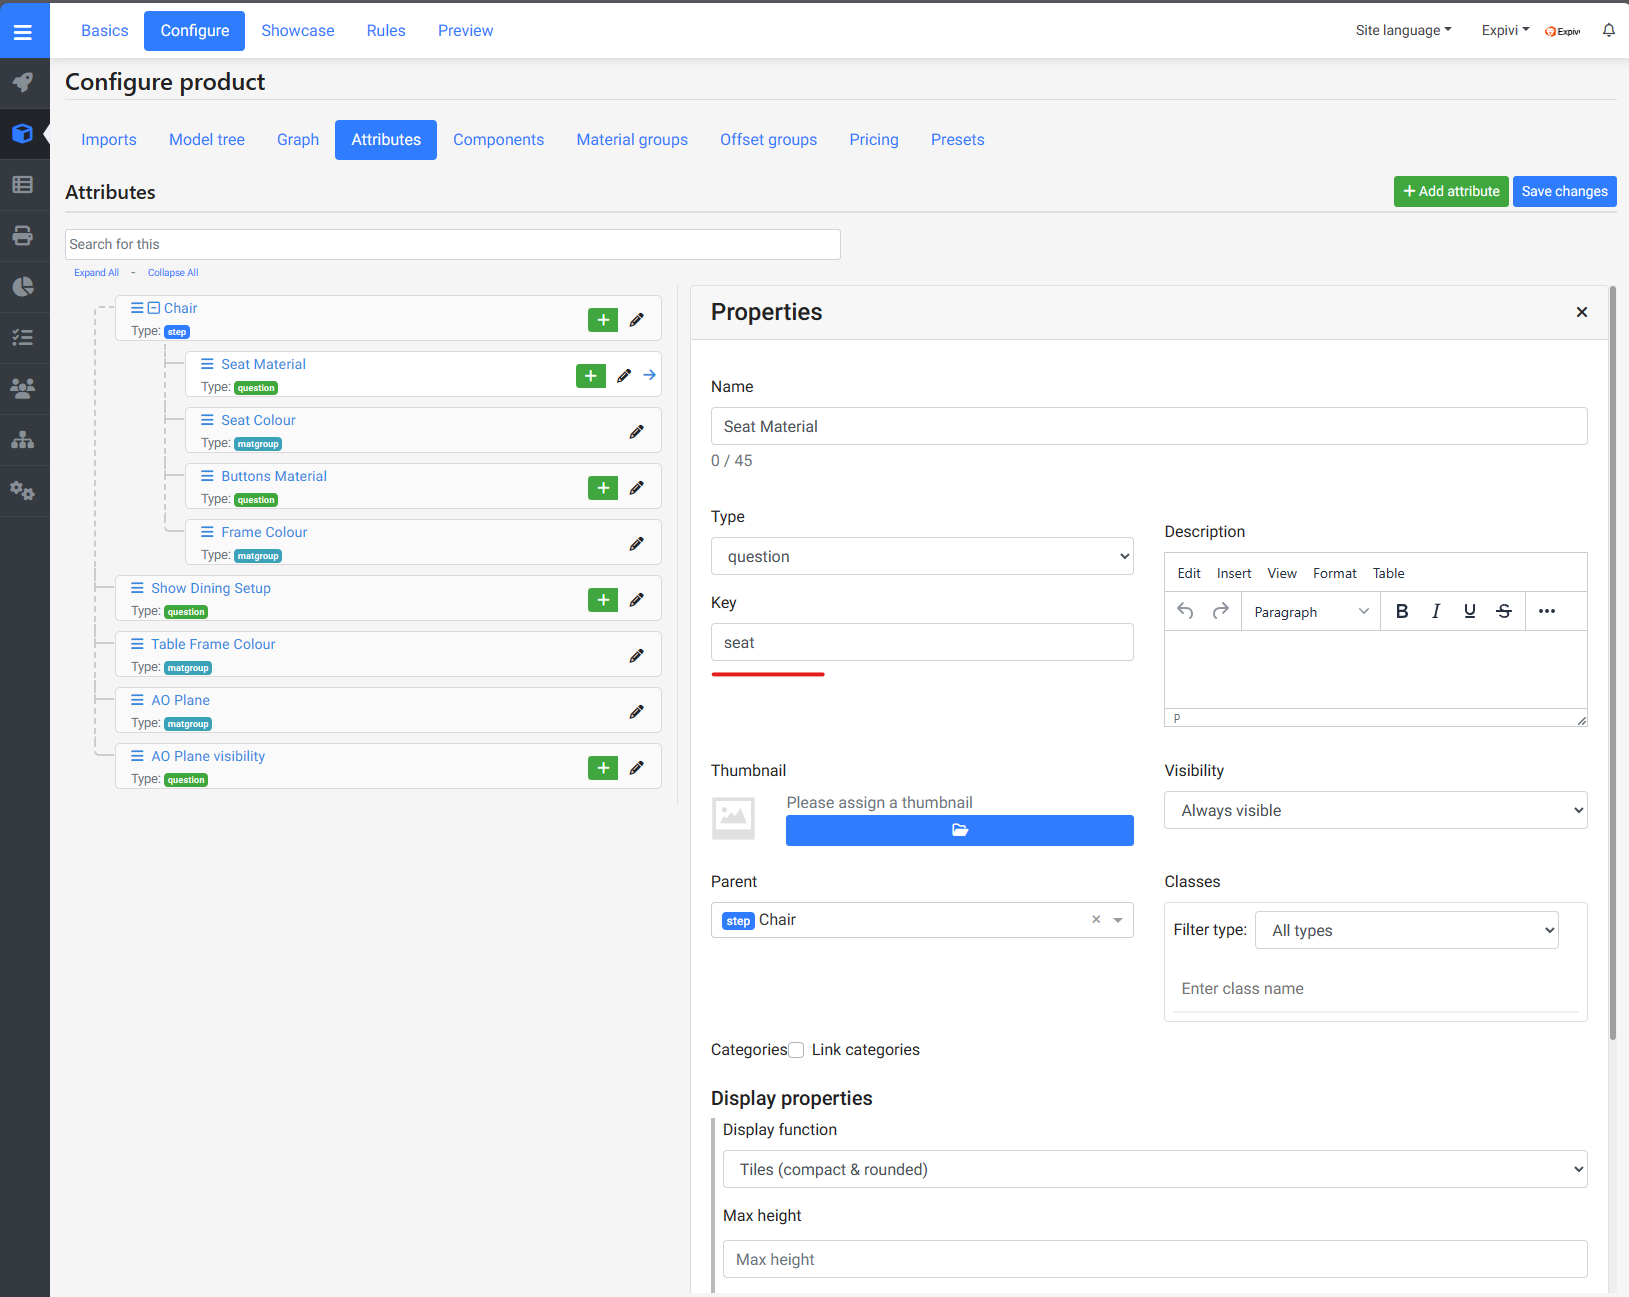
All text between { and } will be replaced by the attribute value keys defined in the Backoffice.
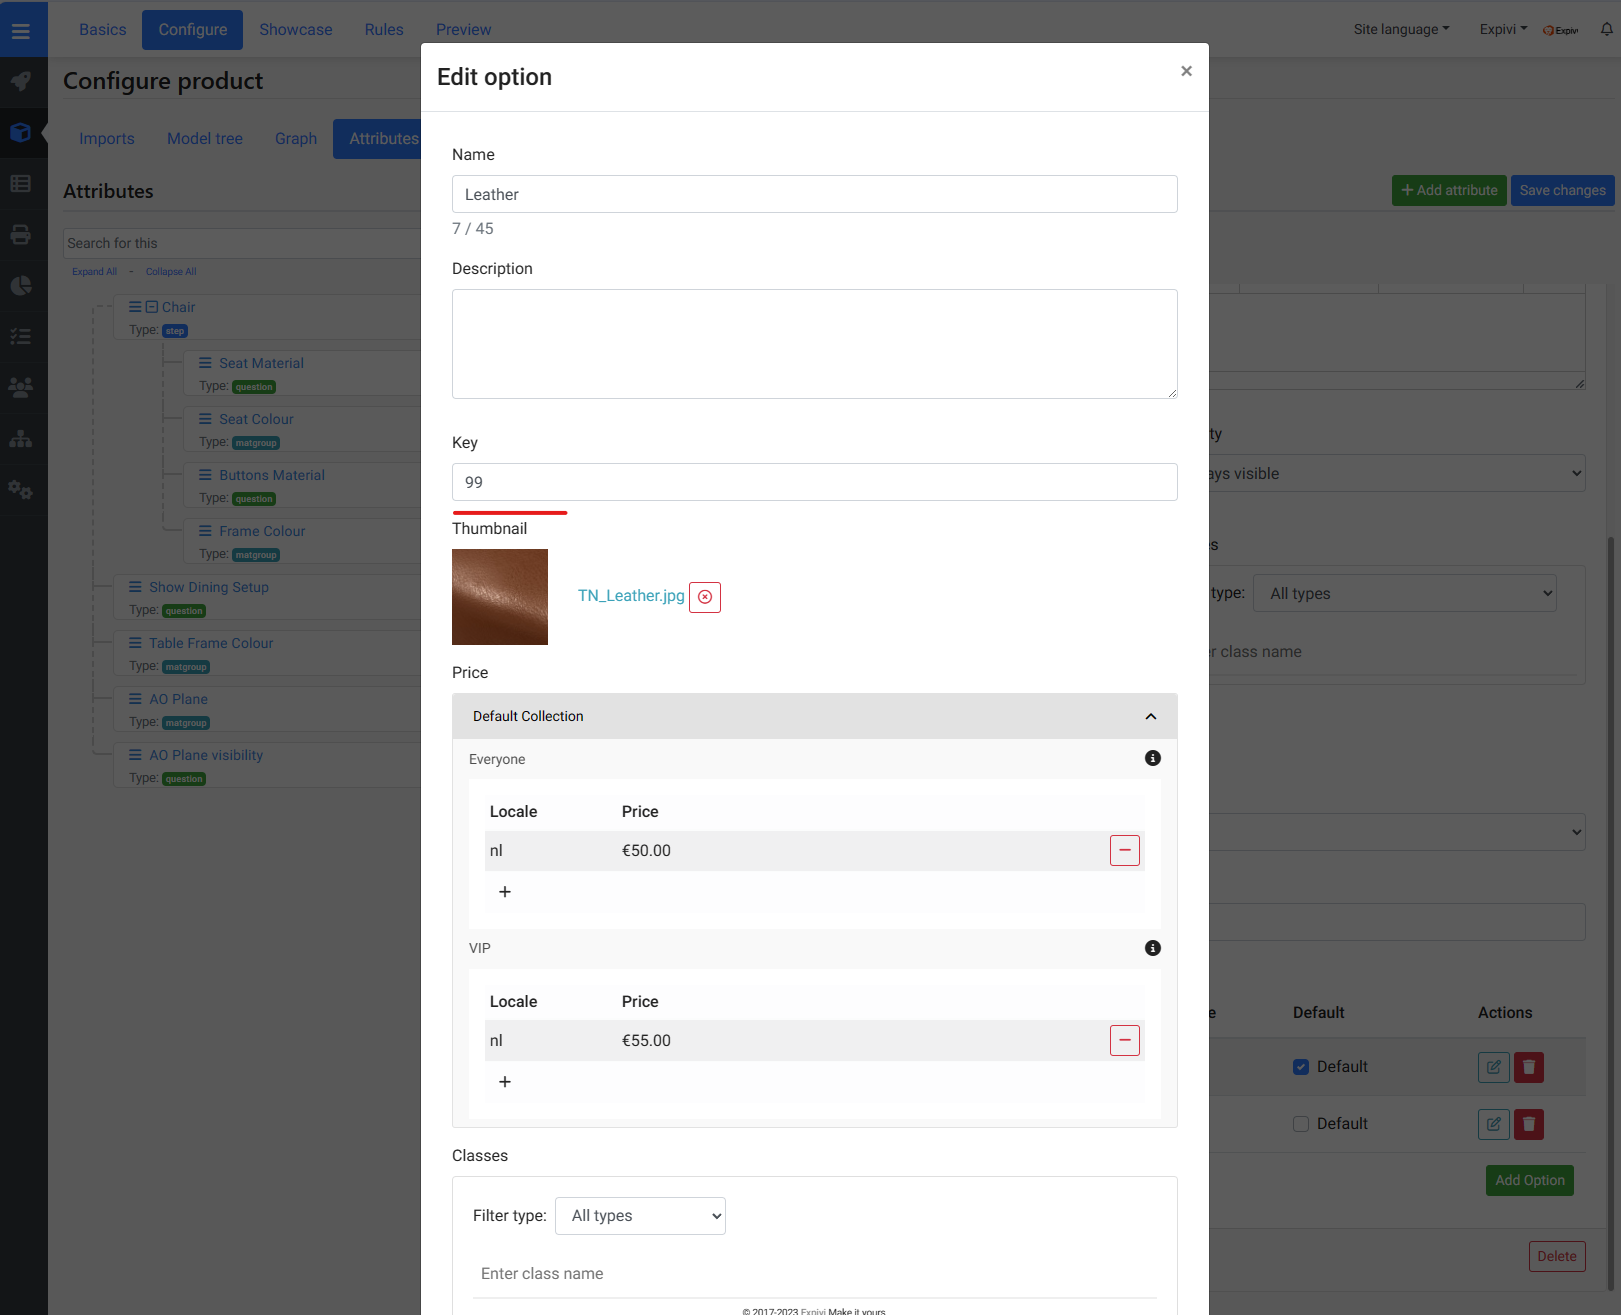
The {Leather} text should point to the attribute key. Upon checkout, these fields will be replaced by the attribute value key based on what the customer has selected as the option for that attribute.
Please note that the variable between brackets will be removed if the attribute is made invisible to the customer.
Example: L{Leather}_SKU will be converted to L99_SKU.
| Attribute - "Leather" | Attribute value - "99" |
|---|---|
 |  |
In addition, the second field will let you determine the delimiter of the SKU. This will be useful when the attributes are invisible, as the duplicate delimiters will be removed.
For example, if the Leather attribute is invisible: L{Leather}{#}{Leather}{#}{Leather}_SKU will be converted to L_SKU.
Preview
The preview will be loaded once the initial Expivi product is chosen from the dropdown. The preview offers the ability to set and save a configuration. This configuration will automatically be loaded as the initial configuration of the product.
Clicking "Save configuration" or "Clear configuration" will not directly save your changes. Please save the changes by clicking "Update" in the Publish section.