Textures
The Textures screen (Assets › Textures) is the image store for 3D texture maps. These are the raw image files (diffuse maps, normal maps, roughness maps, environment maps, and so on) that you assign to property slots inside a Material. The render engine reads them at display time to give a 3D surface its detailed appearance.
What is stored here
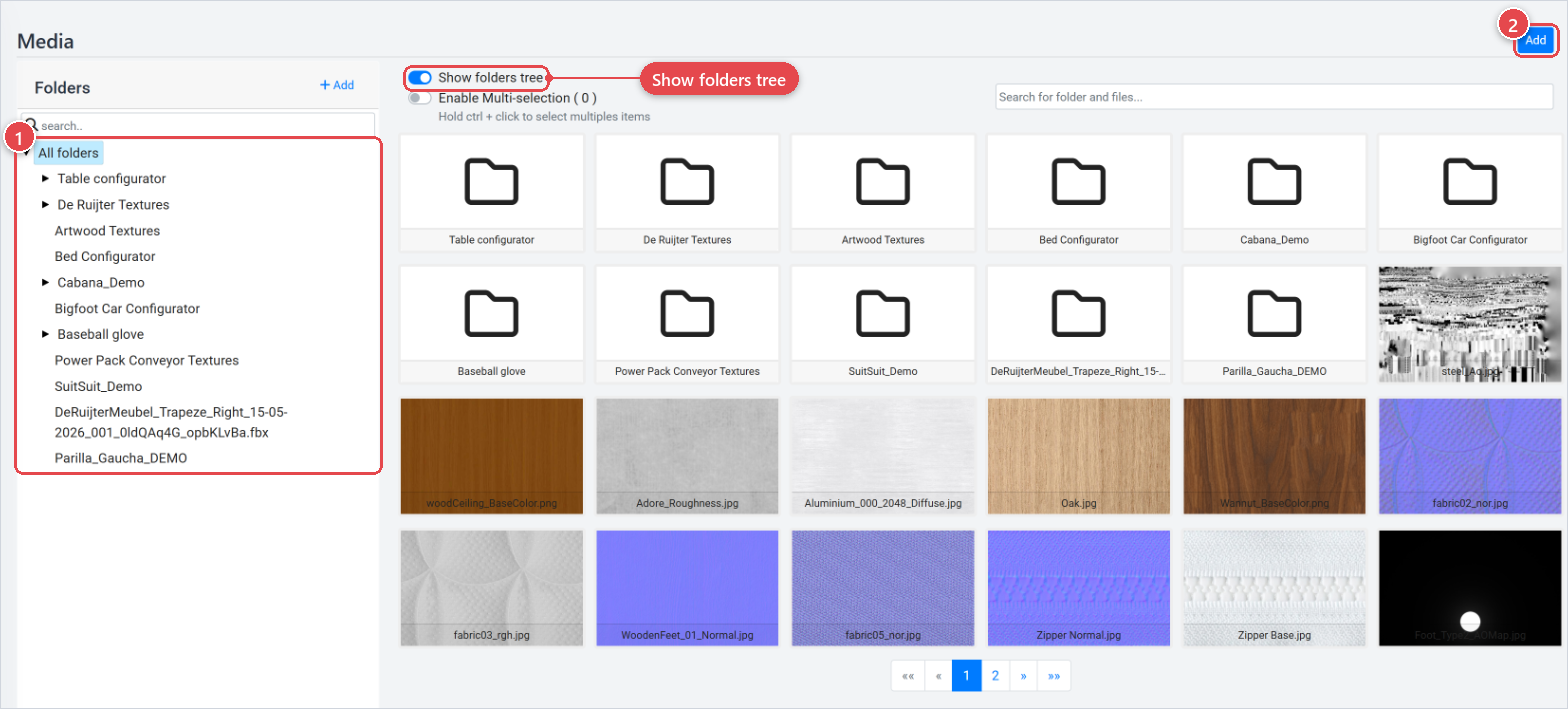
Each item is an image file associated with a folder. You can create folders by clicking the blue + Add button on the top left. If you select a folder and click on + Add again it creates a subfolder inside that folder. Supported file types are JPG, PNG, GIF and SVG and the maximum upload size is 8mb.
Keep your textures as light as possible while still keeping the quality visually high enough to reduce loading times. The more heavy textures are contained in a configuration the longer it needs to load.
How textures are used in Expivi
After you upload a texture here, you assign it to a material property slot in (Materials) (for example, the Diffuse colour map, the Normal map, or the Roughness map in the PBR workflow). The 3D viewer then fetches the file at render time to compute the surface appearance.
Browse textures
The left panel shows a folder tree. Select a folder to load its textures in the grid on the right. Toggle Show folders tree to hide or reveal the folder tree when you need more grid space.
Search for textures by name or URL with the search bar above the grid.
Upload a texture
- Select the destination folder in the left-hand folder tree (or leave the root selected).
- Click Add in the page header to open the upload popover.
- Optionally type a Name (if blank, the original filename is used).
- Either drop a file onto the drop zone or click Upload File to browse.
- Accepted types are shown in the label (JPG, PNG, GIF or SVG); the file must be under 8 MB.
- The file appears in the queue table. Remove individual items with the trash icon or retry failed ones with the refresh icon.
- Click Add to upload the queued files to the selected folder.
Edit a texture
Click a texture card in the grid to open the Edit panel on the right. From there you can:
- Rename the texture by editing the Name field and clicking Save changes.
- Re-upload: replace the file at the same URL with a new file (the URL stays the same after re-upload).
- Download image: save the original file to your computer.
- Delete: permanently removes the texture. Check that no material references it before deleting.
Reuploading a texture keeps the connections to the materials intact and updates all links live. When creating a new iteration always use this option to keep your backoffice clean and organised.
Relate
Manage folders
Right-click a folder in the left panel for options to Add, Rename, and Delete folders. You can drag textures from the grid onto a folder in the left panel to move them into that folder.
- Keep textures organised by material type or surface category (e.g.
Wood/,Metal/,Fabric/,Patterns/) so designers can find the right folder quickly when building or editing a material. - Before deleting a texture, open the relevant material in (Materials) and check whether the texture is assigned to any property slot.