3D visualization rules
3D rules control behaviour inside the 3D scene, such as camera positions, moving offsets or changing the scene based on its current state. Each rule is a named logic graph that you build in the rule designer.
You manage per-visualization rules under Visualization › 3D Visualization, open a product, and select the Rules tab.
These are visualization-level rules tied to a specific product's 3D scene. They are separate from the global catalog rules found under (Rules in v2).
Create a rule
- Click Add rule in the Rules tab header.
- A new rule entry appears in the list. Click Edit to open the rule designer, or Quick Edit to rename or describe the rule inline.
Rule designer
Clicking Edit on a rule opens the rule designer. The designer is a node graph editor where you connect trigger nodes (conditions on the 3D state) to action nodes (for example material swaps, camera changes, offset actions and arithmetic operations). Connect nodes by dragging from one port to another. Save the rule when you are done.
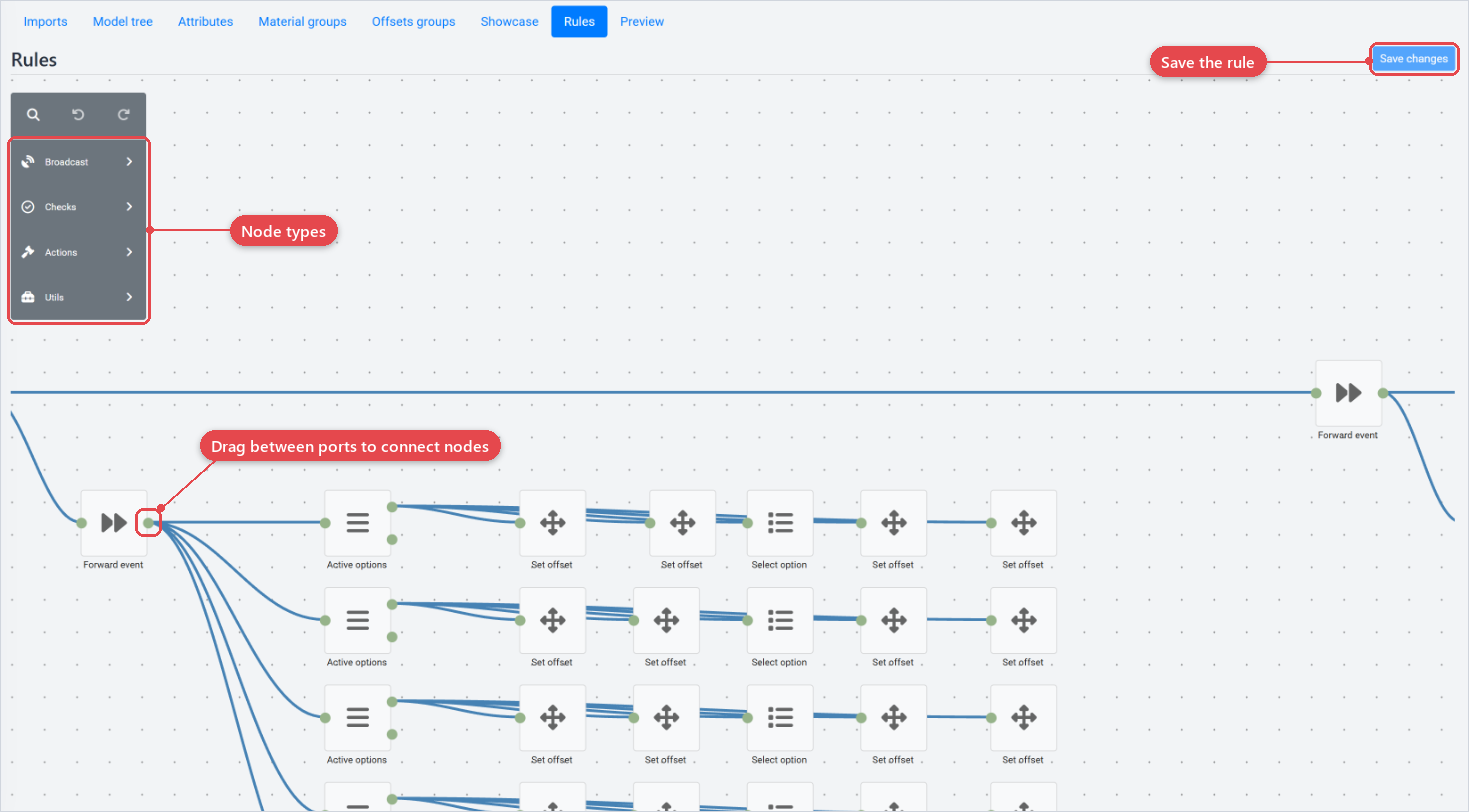
Node types
Broadcasts
Broadcasts are the starting point of every rule-set. This node generates a signal when an event has taken place in the configurator. By selecting the appropriate broadcast-node you will be able to control a rule-set only if a particular event has taken place.
Checks
Check nodes are used to check the condition of an attribute, material group or showcase entity, using these rule-nodes you will be able to specify which signals will proceed through which outputs.
Actions
Using Action-nodes you will be able to define an action to be performed within the product configuration. This can range from selecting options, changing materials colors, adjusting camera positions and much more.
Utilities
As this documentation is ment to only cover the basics of rules I will only be highlighting the Time-Out rule-node, this node makes it possible to set a time-out in order to hold on to a signal for a defined amount of time. This means that you will be able to create a delay between broadcasts, checks and actions.
Give each rule a clear name that describes its trigger and its effect. This makes a long rule list much easier to audit.
3D rules and catalog rules
All rule actions from v1 are still available in the designer, but not all of them make sense in v2. The customer never sees the 3D options. They choose catalog attribute values, and the visualization mapping translates those into 3D options behind the scenes (Visualization mapping).
That means:
- Don't use 3D rules to show or hide 3D options, or to change which options can be selected. The customer doesn't see the 3D options, so these actions have no visible effect.
- Do put option logic in catalog rules (Rules in v2): which values are available, hidden, selected or required, and which warnings show.
- Do use 3D rules for scene behaviour, such as camera moves and offsets.
The rules designer is the same as in v1, but you now open it from Visualization › 3D Visualization. If you migrate a v1 product, move option logic (availability, visibility, selections) out of the 3D rules and into catalog rules.