Material groups
A material group is a group which bundles 3D models in the hierarchy to which expivi can aply a range of materials. This makes it so end-customers can have a range of material selections on a model.
In v2, the materials a customer chooses from don't come directly from the material group. They come from a catalog attribute with a material mapping (Material mapping). The visualization mapping (Visualization mapping) links that attribute to the material group, so the chosen value's material is applied to the slot.
You manage material groups under Visualization › 3D Visualization, select a product, then open the Material groups tab.
Create a material group
- In your 3D software create a Material groups node using
mat_[group-ID]_e, - Place your models in the corresponding groups
- Export your file as
.fbxand import your file. - After importing it created a material group inside the Material groups section
Assign materials to a group
Because the materials come from the material mapping, you don't need to fill the group with every possible material. You can leave the group empty, or assign a single default material. The default is what the viewer shows before a mapped value applies a material.
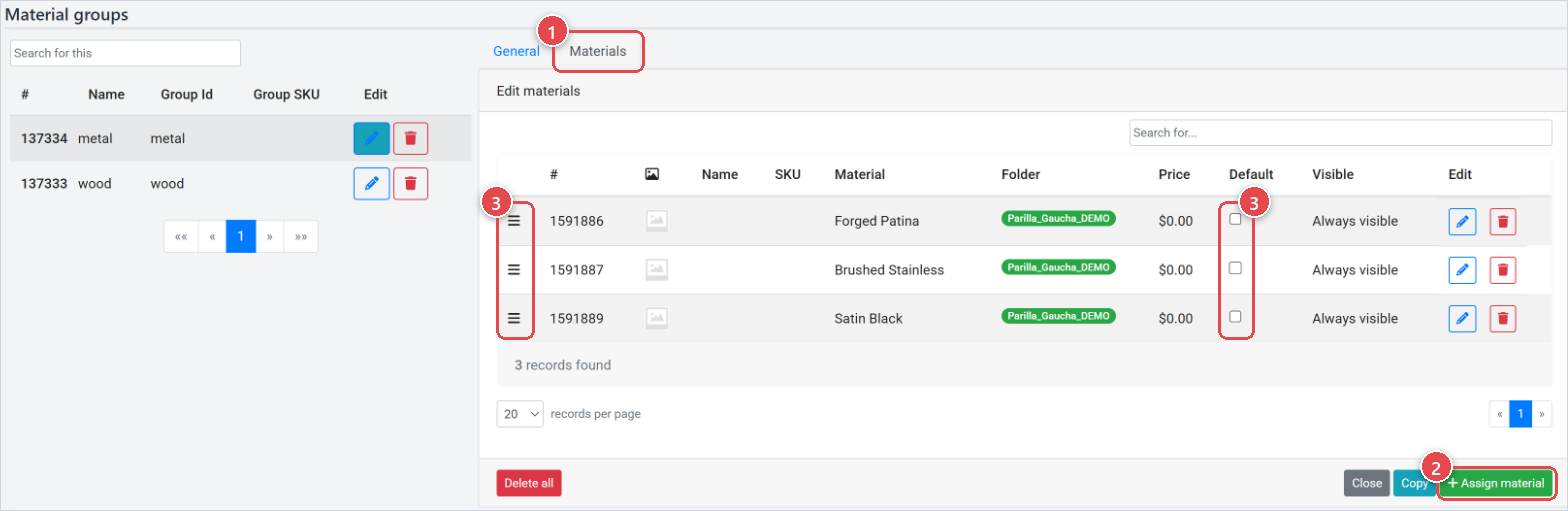
- Open the group and select the Materials sub-tab.
- Add one or multiple materials to the group by pressing the "+Assign material" button on the bottom right
- Drag your default material to the top or click on the default checkbox behind that material
How material groups connect to the catalog
- Create a catalog attribute for the choice, for example "Fabric" (Attributes).
- Give it a material mapping, which links each attribute value to a material (Material mapping).
- In the visualization mapping, link the attribute to the material group in the Map to Attributes section (Visualization mapping).
When the customer picks a value, the viewer applies the mapped material to the material group.
After creating a configurable list attribute you can create all material values and create mapping at the same time by clicking the Bulk assign materials button. This brings up a screen where you can select materials from your material library and create values from there.
Keep material groups lean, with at most one default material each. Manage the full set of choices in the material mapping, so there's one place to add or remove a material.
This is the same screen as in v1, now as its own tab. In v1, a material group held every material the customer could choose, with a price and visibility per material. In v2, the material mapping and the catalog handle the choices, and the material group only needs a default.